|
| This is a picture of Anthony's Grandmother. Alejandra Revis Cisneros. |
 |
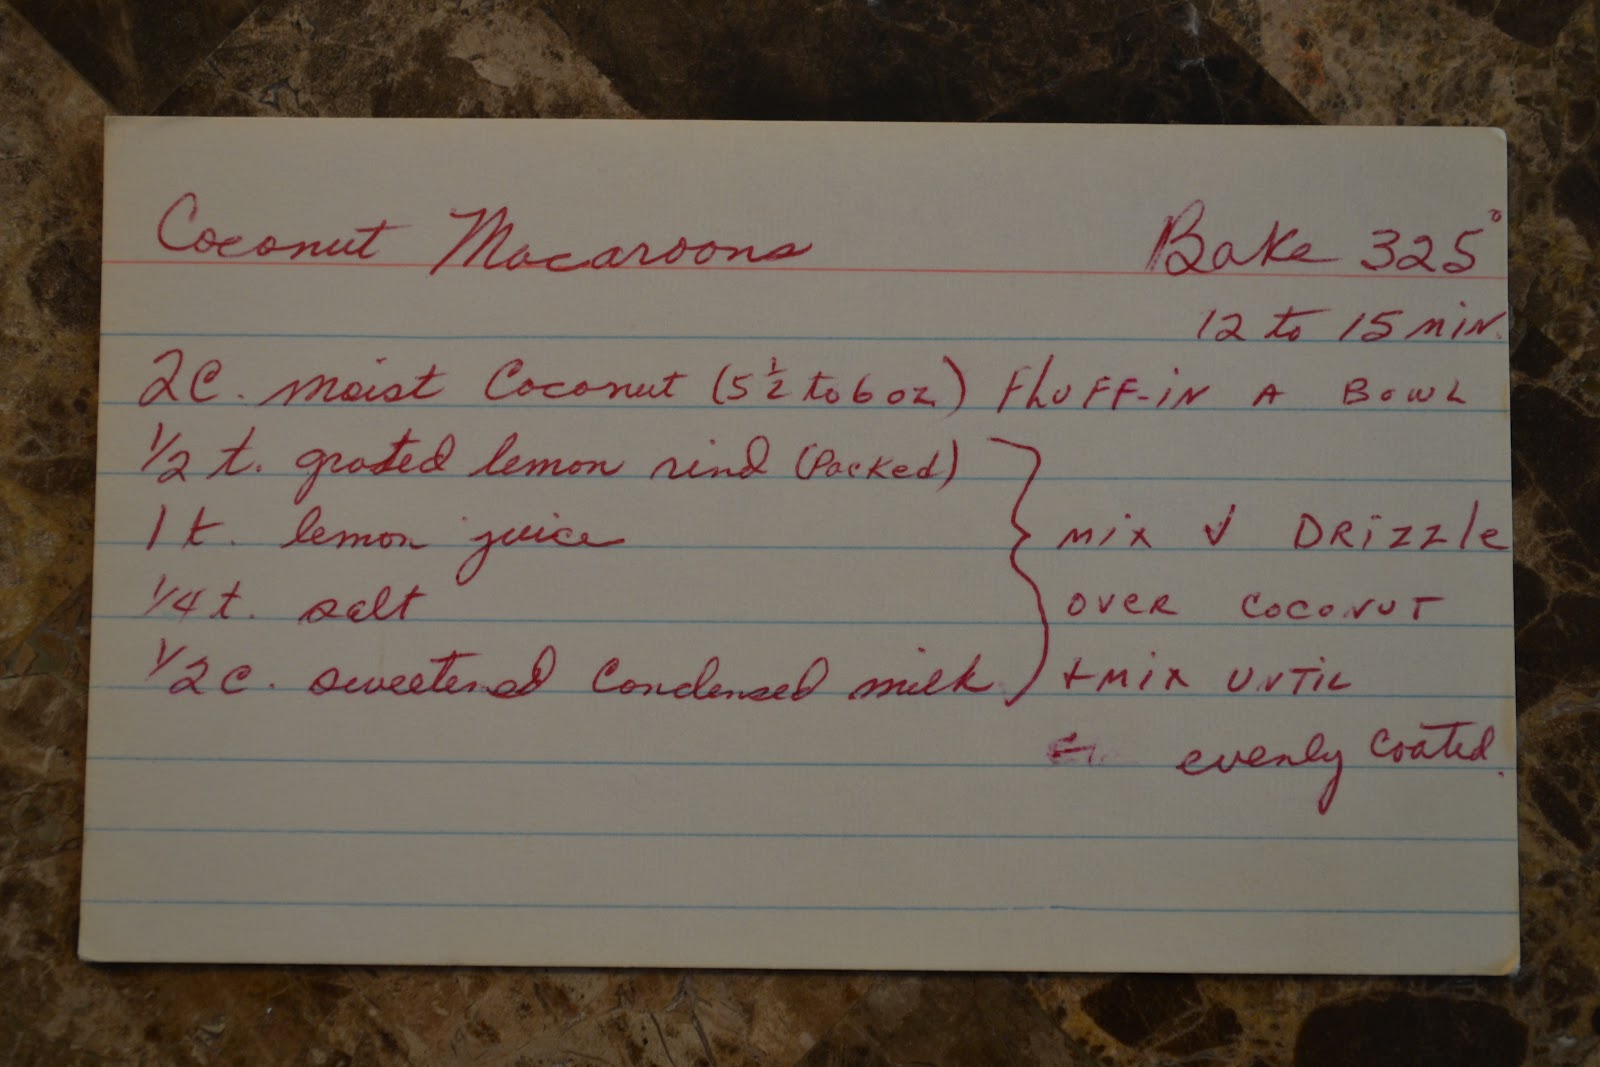
| Her handwritten recipe. |
 |
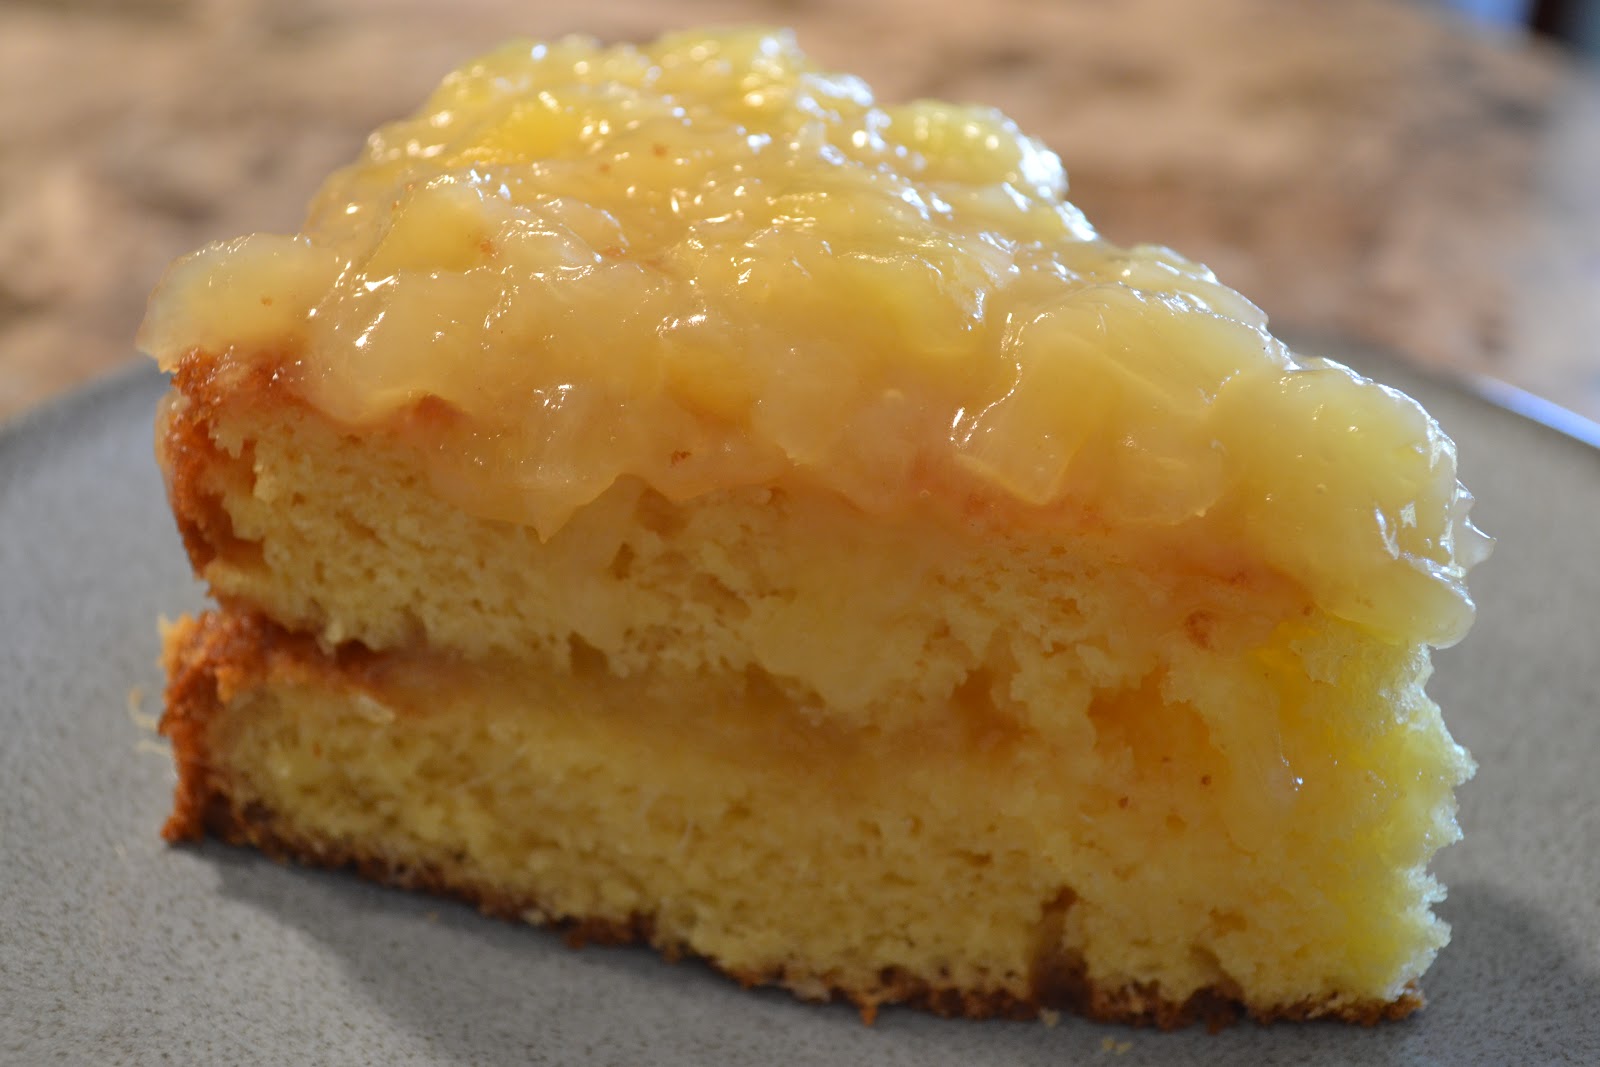
| The finished product. |
 |
| Yum! |
Out of the blue, Anthony asked if I would make his Grandma's Pecan Pie for Thanksgiving this year. Naturally, I said yes and went straight to my big binder. I took one look at the recipe and had doubts about how this pie was going to turn out.
As you can tell by the picture, there are no instructions or anything. So, I made the decision to use a refrigerated Pillsbury Pie Crust and to just mix all the ingredients up in a bowl and pour it into the crust. I did actually mix the sugar and flour together and the pinch of salt was really, a pinch of salt :) I also used light syrup and may or may not have added about an extra ¼ cup of pecans. It IS a pecan pie after all!
All in all, I was worried about how this would come out since there were no instructions. I took it over to my moms and told everyone that although it looked good, I wasn't promising that it tasted good. My mom, of course, made her pecan pie (which I love) and so we at least had a back-up if mine didn't turn out good. Let's just say, it turned out fine. It was a little more custard like maybe? Or jelled differently? Not really sure how to explain it, but it was good! I guess maybe it was the flour that made the difference. Anyway, I'm sure I'll be making this one again. I never got to meet Anthony's Grandma, but I thank her for her recipe :)
Here's my interpretation of the recipe:
Pecan Pie
From: Anthony's Grandma
Alejandra Revis Cisneros
3 eggs
Mix ⅔ cup sugar + 2 Tablespoons flour
1 cup syrup
¼ cup oleo melted
pinch of salt
1 teaspoon vanilla
1 cup chopped pecans
Bake at 400° for 10 minutes, then lower to 350° and bake 30-35 minutes.
* I mixed the (white) sugar and (all purpose) flour together.
* I used light corn syrup.
* I added about an extra ¼ cup of pecans.
I hope you enjoy and give this recipe a second chance in your kitchen too.